
Hello Amigurumi followers, I wanted to share free amigurumi models with you on my Amigurumi mobi page. In my article, I share the Plush bunnies amigurumi patterns for you. In the article on my page, I give detailed information about the Amigurumi pattern; Plush bunnies amigurumi patterns.
Materials:
Yarn: YarnArt Dolce or YarnArt Dolphin
Hook: 4 mm
Abbreviations:
R = row
mc = magic circle
ch = chain
sc = single crochet
st = stitch
sl st = slip stitch
inc = 2 sc in the next stitch
dec = single crochet 2 stitches together
F.o. = finish off
( ) = number of stitches you should have at the end of the round/row
( ) x 6 = repeat whatever is between the brackets the number of times stated
Legs, body and head (one item):
Legs (make 2)
R 1: mc with 6 st (6)
R 2: (inc) x 6 (12)
R 3-6: 12 sc (12)
F.o. and cut the yarn on the first leg.
Don’t cut the yarn on the second leg!
From second leg: 4 ch, join the first leg
Continue crocheting in the round:
R 7: 12 sc on the first leg, sc in 4 ch, 12 sc on the second leg, sc in 4 ch (opposite side) (32)
R 8: 12 sc, inc, 2 sc, inc, 12 sc, inc, 2 sc, inc (36)
R 9-14: 36 sc (36)
R 15: (4 sc, dec) x 6 (30). Begin to stuff
R 16-17: 30 sc (30)
R 18: (3 sc, dec) x 6 (24)
R 19: 24 sc (24)
R 20: (2 sc, dec) x 6 (24)
R 21: (1 sc, dec) x 6 (12)
R 22: 12 sc (12)
R 23: inc x 12 (24)
R 24: (3 sc, inc) x 6 (30)
R 25: (4 sc, inc) x 6 (36)
R 26-30: 36 sc (36)
R 31: (4 sc, dec) x 6 (30)
R 32: (3 sc, dec) x 6 (24)
R 33: (2 sc, dec) x 6 (18)
R 34: (1 sc, dec) x 6 (12)
R 35: dec x 6 (6)
Important: stuff the neck firmly!!!
Arms (make 2)
R 1: mc with 6 st (6)
R 2: (1 sc, inc) x 3 (9)
R 3-4: 9 sc (9). Stuff gently
R 5: dec, 7 sc (8)
R 6: dec, 6 sc (7)
R 7-11: 7 sc (7)
F.o. leaving a tail for sewing.
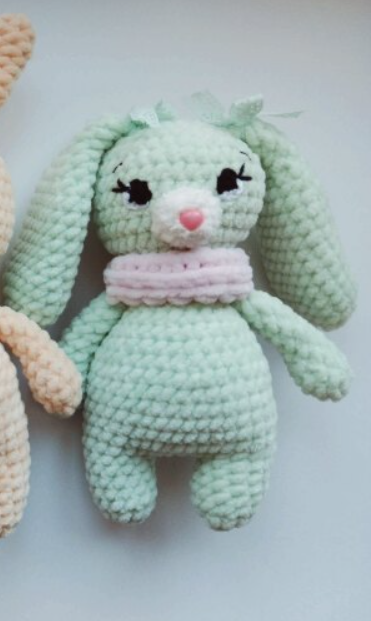
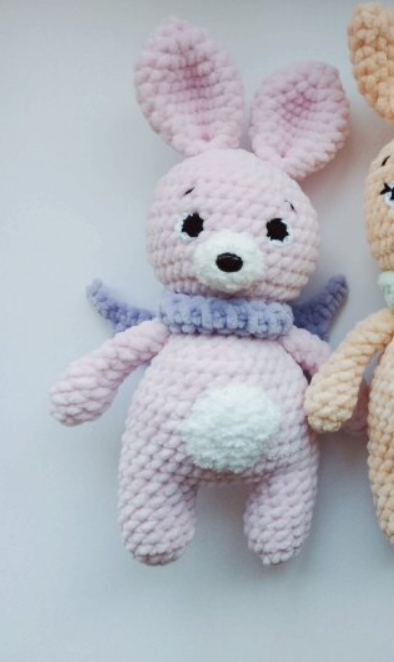
Ears (pink bunny) make 2
R 1: mc with 5 st (5)
R 2: inc x 5 (10)
R 3: (1 sc, inc) x 5 (15)
R 4: (2 sc, inc) x 5 (20)
R 5-9: 20 sc (20)
R 10: (2 sc, dec) x 5 (15)
Fold top of ear flat and sc through both sides across.
Than fold top one time more and join first and last st together with sl st.
F.o. leaving a tail for sewing.
Ears (mint bunny) make 2
R 1: mc with 6 st (6)
R 2: inc x 6 (12)
R 3: (1 sc, inc) x 6 (18)
R 4-12: 18 sc (18)
R 13: (4 sc, dec) x 3 (15)
R 14: (3 sc, dec) x 3 (12)
R 15: (2 sc, dec) x 3 (9)
R 16-18: 9 sc (9)
Fold top of ear flat and sc through both sides across.
F.o. leaving a tail for sewing.
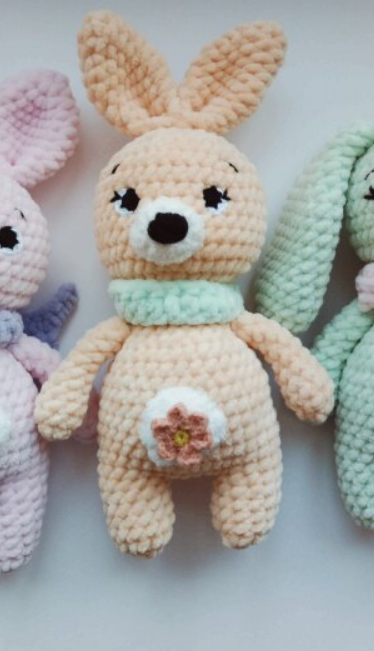
Ears (peach bunny) make 2
R 1: mc with 6 st (6)
R 2: (1 sc, inc) x 3 (9)
R 3: 9 sc (9)
R 4: (2 sc, inc) x 3 (12)
R 5: (3 sc, inc) x 3 (15)
R 6-10: 15 sc (15)
Fold top of ear flat and sc through both sides across.
Than fold top one time more and join first and last st together with sl st.
Sew the ears onto the head close one to another.
Tail
R 1: mc with 6 st (6)
R 2: (1 sc, inc) x 3 (9)
Pull up stitches last row with needle. Sew the tail onto the body.
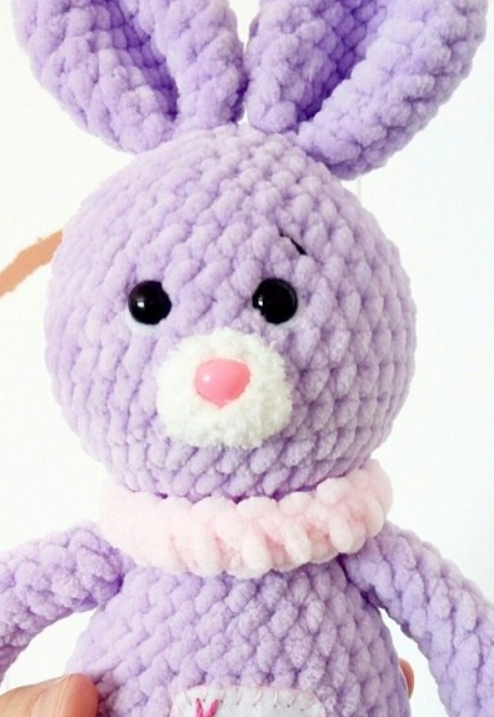
Eyes (make 2)
Use cotton yarn.
With black yarn:
R 1: mc with 6 st (6) – change colour on last st
With white yarn:
R 2: inc x 3, sl st.
You can use safety eyes or embroidered eyes.
Muzzle
With white yarn:
R 1: mc with 6 st (6)
R 2: inc x 6 (12)
R 3: (1 sc, inc) x 6 (18)
R 4: (2 sc, inc) x 6 (24)
F.o. leaving a tail for sewing.
Embroider a nose with black floss. Sew the muzzle onto the head.
You can don’t crochet the muzzle.
Belly
With white yarn:
R 1: mc with 6 st (6)
R 2: inc x 6 (12)
R 3: (1 sc, inc) x 6 (18)
R 4: (2 sc, inc) x 6 (24)
R 5: (3 sc, inc) x 6 (30)
F.o. leaving a tail for sewing.
You can don’t crochet the belly (view bunny photos).