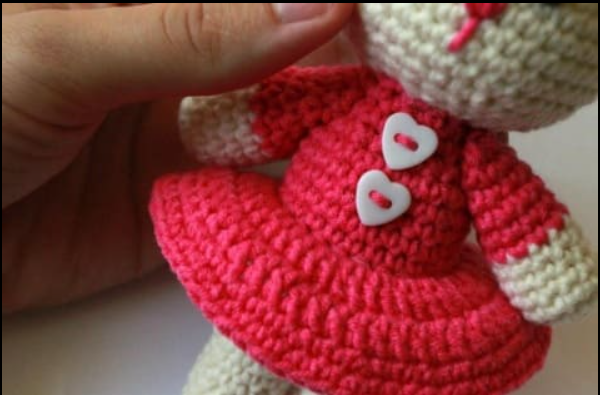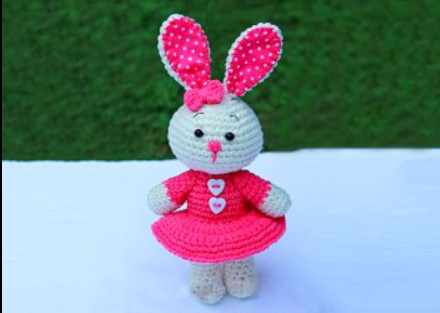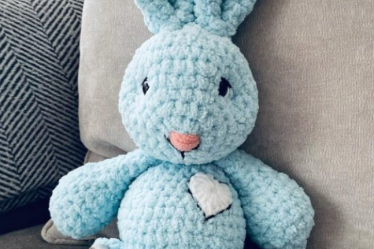

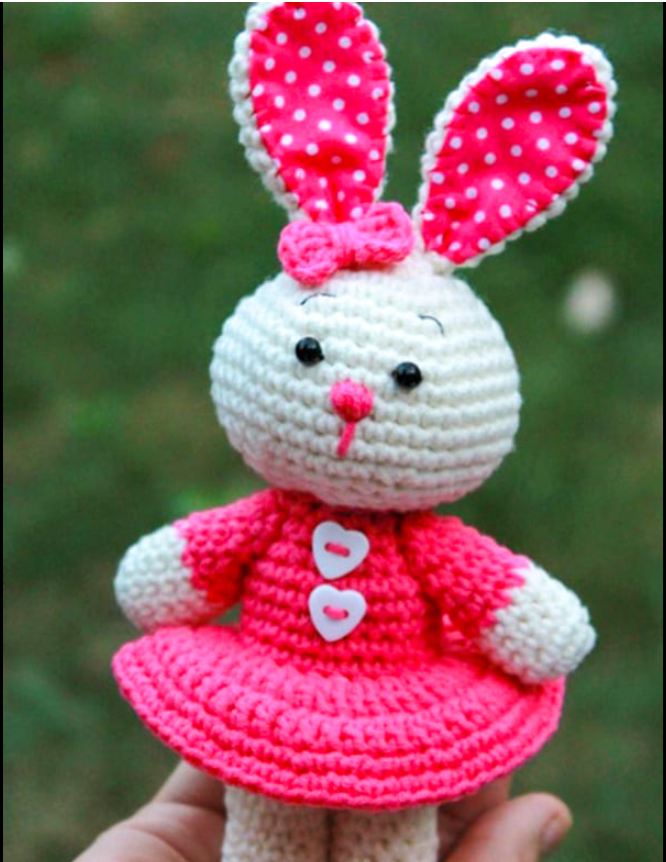
Hello Amigurumi followers, I wanted to share free amigurumi models with you on my Amigurumi mobi page. In my article, I share the Amigurumi Crochet Cute Bunny Free Pattern for you. In the article on my page, I give detailed information about the Amigurumi pattern;Amigurumi Crochet Cute Bunny Free Pattern.
Tools and materials
• Yarn Art Jeans (1 skein milk, 1 skein crimson)
• Crochet hook #2
• Filler holofiber
• Thick sewing needle
• Two black plastic eye beads
• Fine black sewing thread
• A piece of fabric for sewing on the ears
Abbreviations
MR– Magic ring
Ch– Chain
Sc– Single crochet
Inc– Increase
Dec– Decrease
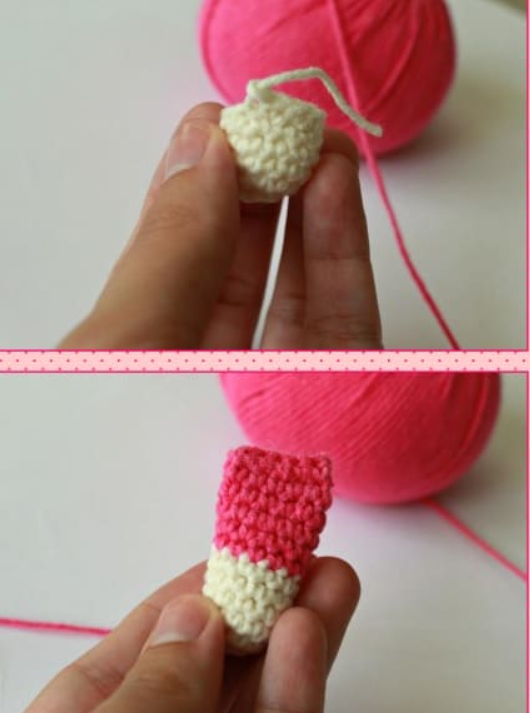
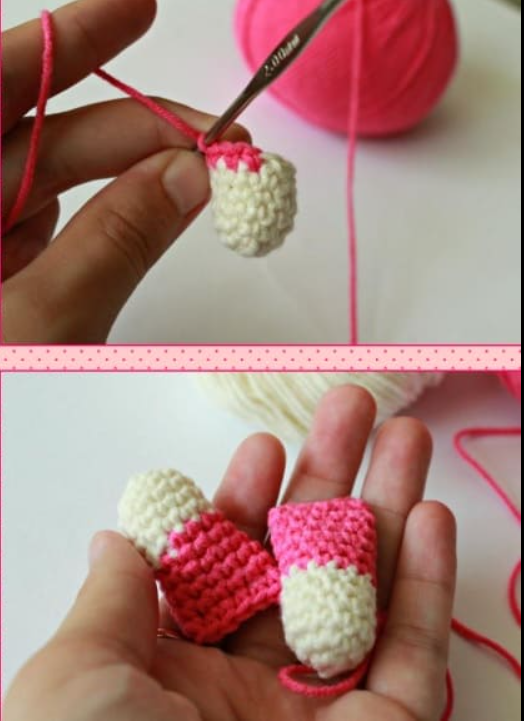
Legs and body
We start crocheting with a thread of milky color.
Rnd 1: 6 sc in MR
Rnd 2: 6 inc (12)
Rnd 3: 2 sc, inc, repeat 4 times (16)
Rnd 4: 6 sc, dec, dec, 6 sc (14)
Rnd 5: 5 sc, dec, dec, 5 sc (12)
Rnd 6-13: 12 sc
Rnd 14: put the legs together and crochet 24 sc
Change the color of the thread to raspberry.
Rnd 15-22: 24 sc
Rnd 23: 2sc,dec (18)
Rnd 24: 18 sc
Rnd 25: 1sc,dec (12)
Rnd 26: 12sc
Head
We crocheting with milky color.
Rnd 1: 6 sc in MR
Rnd 2: 6 inc (12)
Rnd 3: 1sc,inc (18)
Rnd 4: 2sc,inc (24)
Rnd 5: 3sc,inc (30)
Rnd 6: 4sc,inc (36)
Rnd 7: 5sc,inc (42)
Rnd 8-12: 42 sc
Rnd 13: 5sc,dec (36)
Rnd 14: 4sc,dec (30)
Rnd 15: 3sc,dec (24)
Rnd 16: 2sc,dec (18)
Rnd 17: 1sc,dec (12)
Rnd 18: dec (6)
Ears (Make 2)
We crocheting with a thread of milky color.
Rnd 1: 5 sc in MR
Rnd 2: 5 inc (10)
Rnd 3: 10 sc
Rnd 4: 1sc, inc (15)
Rnd 5-9: 15 sc
Rnd 10: 1sc, dec (10)
Rnd 11-12: 10 sc
Rnd 13: 1sc, dec, repeat 3 times, 1 sc (8)
Arms
We start crocheting with a thread of milky color.
Rnd 1: 6 sc in MR
Rnd 2: 6 inc (12)
Rnd 3-6: 12 sc
Change color to raspberry.
Rnd 7-11: 12 sc
Put together and knit sc.
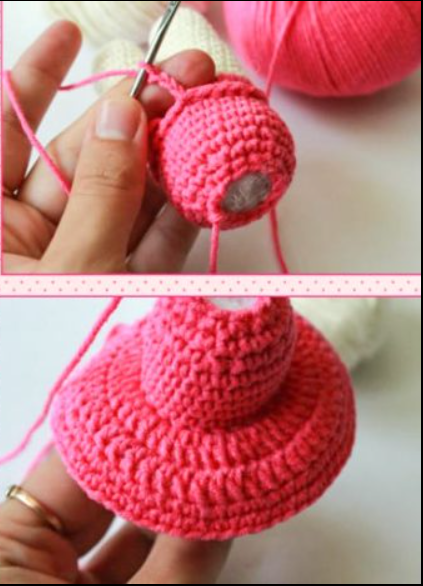
Skirt
In the first row we tie the body of the bunny in a circle of sc, we finish a row with a connecting column, 3 ch turning, then in each we knit a column in two dc, a connecting column at the end of the row, 3 ch turning the third row from dc, 1 ch turning, fourth row 2 sc, inc to the end of the row, connecting post, 1 ch of turning and the last a row we knit sc.
Assembly
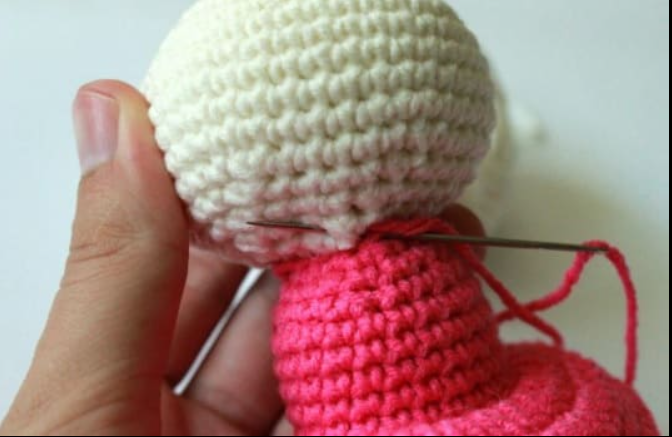
• Sew the head to the body of the bunny.
• We sew the ears with fabric and sew to the head.
• We embroider a nose, sew on eyes, and accessories.
Congratulations, you’ve completed the crochet toy cute bunny pattern!
All Finished.