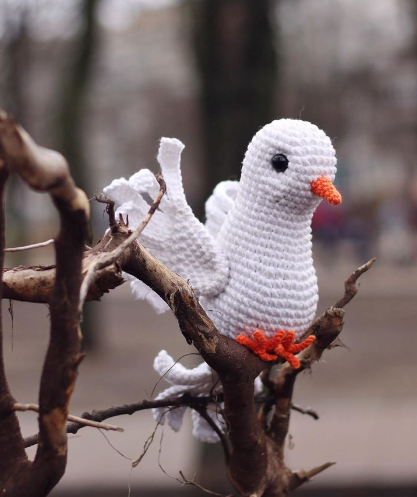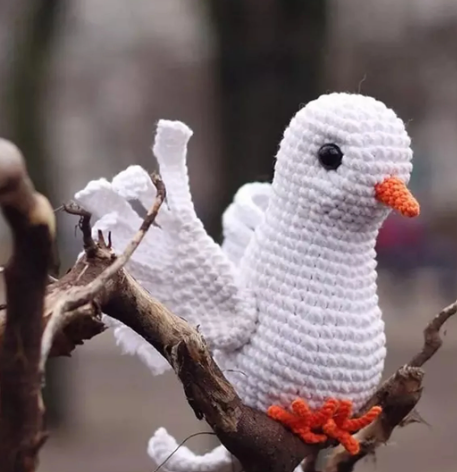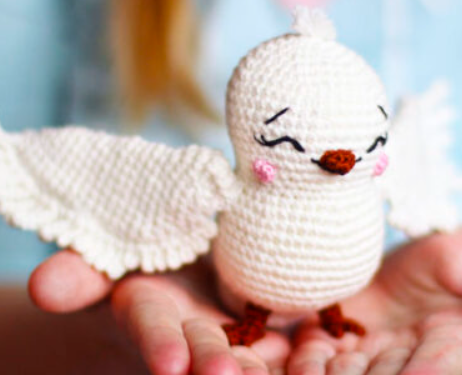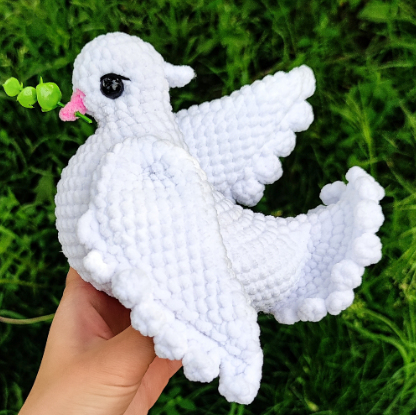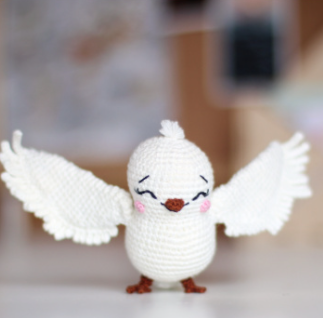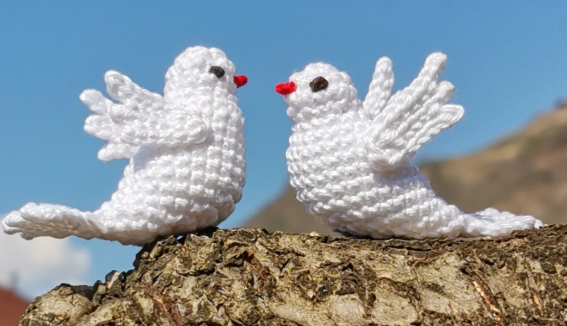
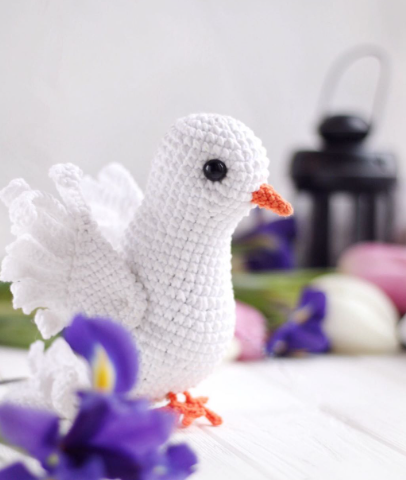
Hello Amigurumi followers, I wanted to share free amigurumi models with you on my Amigurumi mobi page. In my article, I share the Amigurumi Dove Free PDF Crochet Pattern for you. In the article on my page, I give detailed information about the Amigurumi pattern; Amigurumi Dove Free PDF Crochet Pattern.

Materials and tools:
Yarn: YarnArt Jeans plus (100g/160m): white #62, YarnArt Jeans (50g/160m): orange #77
You can use any yarn! This will change the size of the toy. The main thing is that the orange yarn is 2 times thinner. If you use YarnArt Jeans as the main one, then for the paws and beak, you can simply divide the thread into 2 parts.
Hook
Plastic or any other eyes 1.2 cm in diameter
Thick (gypsy) sewing needle
Scissors
Eye glue
Filler: holofiber, synthetic winterizer, synthetic winterizer
Abbreviations
vp – air loop/ ch:chain
sc – single crochet
ssn – double crochet
pssn – half-column with a crochet
pr – increase
ub – decrease
ss – connecting column
Head + body:
1 row: 6 sc in the amigurumi ring
2 row: 6 inc (12)
3rd row: (sc, inc) × 6 (18)
4 row: (2 sc, inc) × 6 (24)
5 row: (3 sc, inc) × 3, 12 sc (27)
6 row: (4 sc, inc) × 3, 12 sc (30)
7 row: (5 sc, inc) × 3, 12 sc (33)
8-10 row: 33 sc (33)
11 row: (5 sc, dec) × 3, 12 sc (30)
12 row: (4 sc, dec) × 3, 12 sc (27)
13 row: (3 sc, dec) × 3, 12 sc (24)
We stuff our heads.
14 row: 24 sc (24)
15 row: (7 sc, inc) × 3 (27)
16 row: 27 sc (27)
17 row: (8 sc, inc) × 3 (30)
18-20 row: 30 sc (30)
21 row: (9 sc, inc) × 3 (33)
22 row: 3 sc, (3 sc, inc) × 3, 18 sc (36)
23 row: 36 sc (36)
24 row: 3 sc, (4 sc, inc) × 3, 18 sc (39)
25-27 row: 39 sc (39)
28 row: 3 sc, (4 sc, dec) × 3, 18 sc (36)
29 row: 3 sc, (3 sc, dec) × 3, 18 sc (33)
30 row: 33 sc (33)
31 row: (9 sc, dec) × 3 (30)
We stuff the body.
32 row: (8 sc, dec) × 3 (27)
33 row: (7 sc, dec) × 3 (24)
34 row: (6 sc, dec) × 3 (21)
35 row: (5 sc, dec) × 3 (18)
We fill the part completely.
36 row: (4 sc, dec) × 2, 6 sc (16)
37 row: 11 sb (you may need a different number of sb, the main thing is that when flattening the tail is parallel to the ground, and the belly is directed down)
⠀
We fold the tail and knit 7 sbn through both sides, fasten, but do not cut the thread.
Let’s move on to knitting the plumage of the tail:
1 feather: 12 ch, dc in the fourth loop from the hook, 2 dc, 3 dc, 2 sc, sl-st, sl-st in the base loop
2 and 3 feathers: sl-st in the next loop of the base, ch 15, sl-st in the fourth loop from the hook, 3 dc, 4 dc, 3 sc, sl-st, sl-st in the same loop of the base
4 feather: sl-st in the next loop of the base, ch 18, sl-st in the fourth loop from the hook, 4 dc, 5 dc, 4 sc, sl-st, sl-st in the same loop of the base
5 and 6 feathers: sl-st in the next loop of the base, ch 15, sl-st in the fourth loop from the hook, 3 dc, 4 dc, 3 sc, sl-st, sl-st in the same loop of the base
7 feather: sl-st in the last loop of the warp, ch 12, sl-st in the fourth loop from the hook, 2 dc, 3 dc, 2 sc, sl-st, sl-st in the last loop of the warp, cut and fasten the thread.
For the splendor of the tail, we will make the second row of plumage:
1 feather: 12 ch, dc in the fourth loop from the hook, 2 dc, 3 dc, 3 sn
2 pen: 15 ch, dc in the fourth loop from the hook, 3 dc, 4 dc, 4 sn
3 pen: 16 ch, dc in the fourth loop from the hook, 4 dc, 4 dc, 4 sn
4 pen: 15 ch, dc in the fourth loop from the hook, 3 dc, 4 dc, 4 sn
5 pen: ch 12, dc in the fourth loop from the hook, 2 dc, 3 dc, 3 sb, cut and fasten the thread.
We apply the part on a row above the plumage of the tail and sew.
Wings:
1 row: 6 sc in the amigurumi ring (6)
2nd row: (sc, inc) × 3 (9)
3 row: (2 sc, inc) × 3 (12)
4 row: 2 sc, 2 inc, 8 sc (14)
5 row: 3 sc, 2 inc, 9 sc (16)
6 row: 4 sc, 2 inc, 10 sc (18)
7 row: 4 sc, 2 dec, 10 sc (16)
8 row: 3 sc, 2 dec, 9 sc (14)
9 row: 2 sc, 2 dec, 8 sc (12)
10 row: sc, 2 dec, 7 sc (10)
11 row: 2 dec, 5sc, 2 dec, 3sc, 2 dec, cut the thread and close the hole.
⠀
Plumage:
We attach the white thread to the pointed edge of the wing.
1 feather: ch 15, dc in the fourth loop from the hook, 3 dc, 4 dc, 4 sc, sl-st in the warp loop
2-3 feathers: sl-st in the next loop of the base, ch 15, sl-st in the fourth loop from the hook, 3 dc, 4 dc, 4 prs, sl-st in the same loop of the base
4-6 feathers: sl-st in the next loop of the base, ch 12, sl-st in the fourth loop from the hook, 2 dc, 3 dc, 3 prs, sl-st in the same loop of the base
7-9 feathers: sl-st in the next warp st, ch 9, sl-st in the fourth st from the hook, sl-st, 2 dcs, 2 sc, sl-st in the same warp st, cut and hide the thread.
For the wings we use a thread mount. We fasten the wings approximately between 24 and 25 side by side.
We string the wing on the needle behind the front of the canvas, capturing 2 sc.
We introduce the thread at the attachment point of the first wing and bring it out at the attachment point of the second, similarly we string the second wing. And we introduce it back into the body, through the same points.
For strength, you can repeat, pull, tie the edges of the thread under the first wing and hide them inside the toy.
⠀
Beak:
1 row: 4 sc in the amigurumi ring
2nd row: 4 sc (4)
3rd row: (sc, inc) × 2 (6)
4 row: 6 sc (6)
5 row: (2 sc, inc) × 2 (8)
6 row: 8 sc (8), cut off and fa犀利士 sten the thread.
We sew starting from the 8th row.
We glue the eyes starting from the 7th row. At the place where the eyes are attached, we make a small horizontal tightening.
Paws:
(6 ch, sl-st in the second loop from the hook, 4 sl-st) × 3, sl-st in the center of the foot, 4 ch, sl-st in the second loop from the hook, 2 sl-st, sl-st in the center of the foot, 3 ch, cut and fasten the thread.
Sew the paws between 7 and 8 next to the side of the tail.
⠀
Since the dove is not worth it, it is best to hang it.