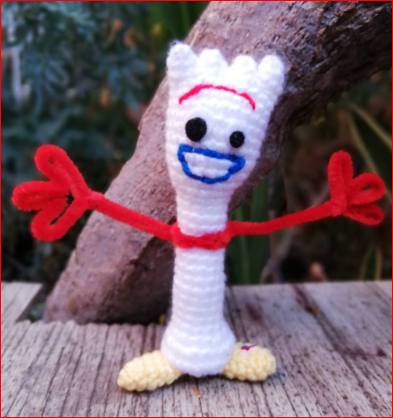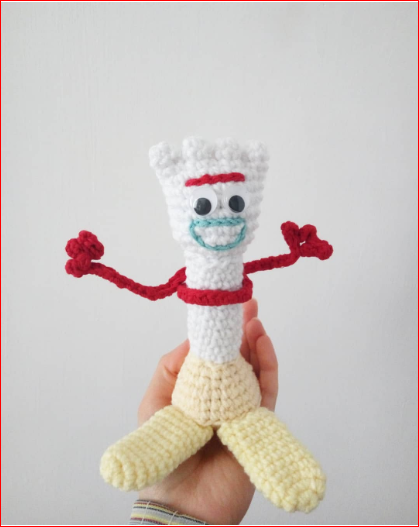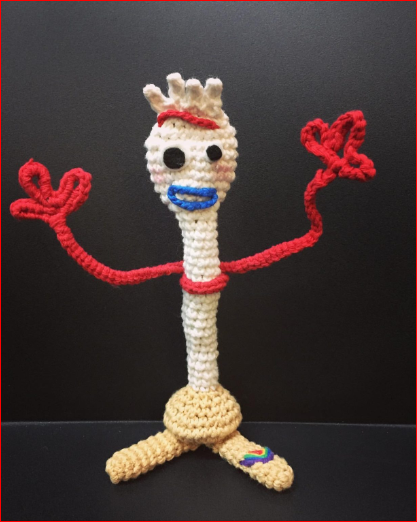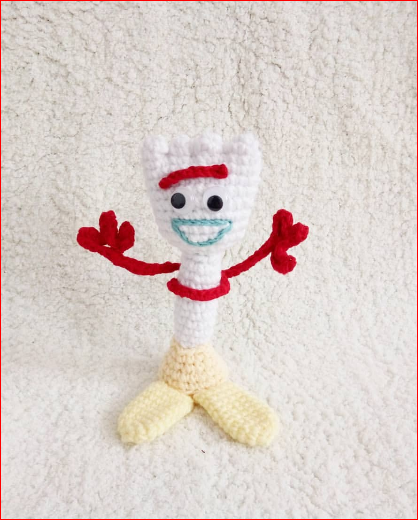

Hello Amigurumi followers, I wanted to share free amigurumi models with you on my Amigurumi mobi page. In my article, I share the Amigurumi Forky Knitting Free Pattern for you. In the article on my page, I give detailed information about the Amigurumi pattern;Amigurumi Forky Knitting Free Pattern .
Materials
Worsted Weight Yarn in the following colors:
White (try using Brava Worsted in White)
Cream (try using Brava Worsted in Cream)
Light Brown/Taupe (try using Brava Worsted in Almond)
Red (try using Brava Worsted in Red)
Blue (try using Brava Worsted in Celestial)
Red pipe cleaners/chenille stems
A pair of googly eyes (optional: in 2 different sizes)
Glue Gun and Hot Glue
Poly-fil or any Polyester Stuffing of your choice
Plastic Spoon
(I can’t believe I even have to say this… but plastic forks are
NOT RECOMMENDED)
3.5 mm Crochet Hook
Yarn Needle
Stitch Markers
Scissors
Stitches & Abbreviations
ch – chain
sk – skip
st/sts – stitch/stitches
BLO – back loop only
sc – single crochet
sc inc – single crochet increase, 2 single crochets in one stitch
sc dec – single crochet decrease, single crochet 2 stitches together
Base
Using a 3.5 mm crochet hook and cream color yarn…
Round 1: Magic Ring with a base of 6 sc (6 sts)
Round 2: sc inc in each st around (12 sts)
Round 3: [sc, sc inc] x 6 times (18 sts)
Round 4: [2 sc, sc inc] x 6 times (24 sts)
Round 5: [3 sc, sc inc] x 6 times (30 sts)
Round 6: sc BLO in each st around (30 sts)
Round 7: sc in each st around (30 sts)
Round 8: [3 sc, sc dec] x 6 times (24 sts)
Before continuing to decrease, I put a small piece of circular cardboard
to help keep the base flat.
Round 9: [2 sc, sc dec] x 6 times (18 sts)
Round 10: sc in each st around (18 sts)
Stuff a small amount of poly-fil to help keep the spork in place.
Round 11: [sc, sc dec] x 6 times (12 sts)
Don’t bother closing the hole as this is where you will be placing the
spork and leave a long tail to sew and secure the spork piece to the
base.
Spork
Using a 3.5 mm crochet hook and white color yarn…
Round 1: Magic Ring with a base of 6 sts (6 sts)
Round 2: [sc, sc inc] x 3 times (9 sts)
Round 3-20: sc in each st around (9 sts)
(You can add on a few more rounds here if you want to give Forky a bit
more length)
Round 21: sc inc in each st around (18 sts)
Round 22: [sc, sc inc] x 9 times (27 sts)
Round 23-29: sc in each st around (27 sts)
Round 30: [7 sc, sc dec] x 3 times (24 sts)
Round 31: [4 sc, sc dec] x 4 times (20 sts)
Round 32: sc in each st around (20 sts)
Before crocheting the spikes on the spork, I placed a plastic spoon
inside to help it keep its shape.
Spike 1
Round 33: Sc in the next 3 st, sk the next 15 sts, sc in the next 2 sts
(5 sts)
Round 34: Sc in each st around the spike (5 sts)
Cut yarn, leaving a tail to close up the stitches and pull the yarn
through the last st completely.
Spike 2
Round 33: Sc in the first 2 skipped sts from Round 32, sk the next 10
sts, sc in the next 2 sts (5 sts)
Round 34: Sc in each st around the spike (5 sts)
Cut yarn, leaving a tail to close up the stitches and pull the yarn
through the last st completely.
Spike 3
Round 33: Sc in the next 3 skipped sts, sk the next 5 sts, sc in the
next 2 sts (5 sts)
Round 34: Sc in each st around the spike (5 sts)
Cut yarn, leaving a tail to close up the stitches and pull the yarn
through the last st completely.
Spike 4
Round 33: Sc in the remaining sts (5 sts)
Round 34: Sc in each st around the spike (5 sts)
Cut yarn, leaving a tail to close up the stitches and pull the yarn
through the last st completely.
Using a yarn needle, fasten off each spike using the ultimate finish
technique by threading the tail of the yarn through the front loop only
of each st from the outside to the inside. Gently pull to close the gap.
Then thread it into the amigurumi to hide the remaining tail.
Feet/Stıcks
Using a 3.5 mm crochet hook and taupe/light brown yarn…
Round 1: Magic Ring with a base of 6 sts (6 sts)
Round 2: [2 sc inc, sc] x 2 times (10 sts)
Round 3-8: Sc in each st around (10 sts)
Leave a tail to sew onto the base
Eyebrows
Using a 3.5 mm crochet hook and red yarn…
Row 1: Ch 10
Mouth
Using a 3.5 mm crochet hook and blue yarn…
Top piece: Ch 5
Bottom piece: Ch 6
Assembly
Put the spork into the base and use the long tail of yarn left over from
the base to secure it. Then, attach the popsicle stick feet to the base by
sewing it on.
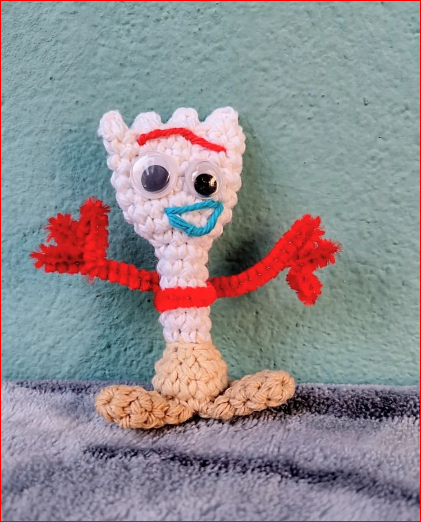
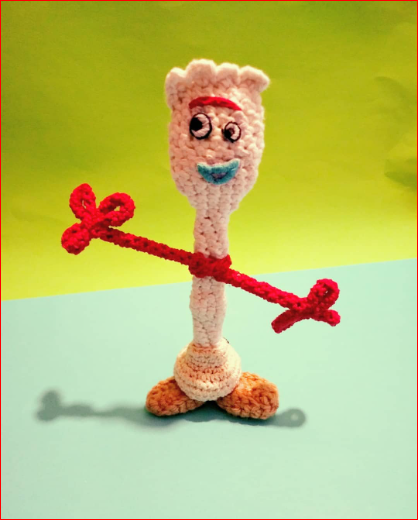
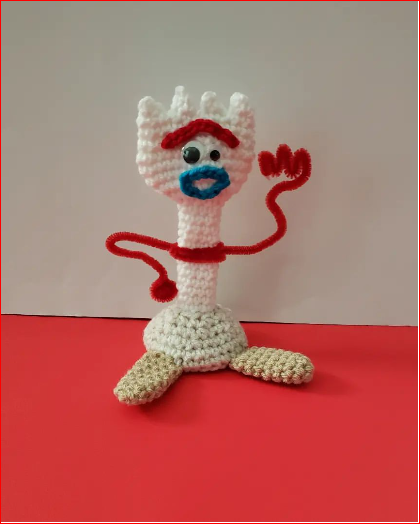
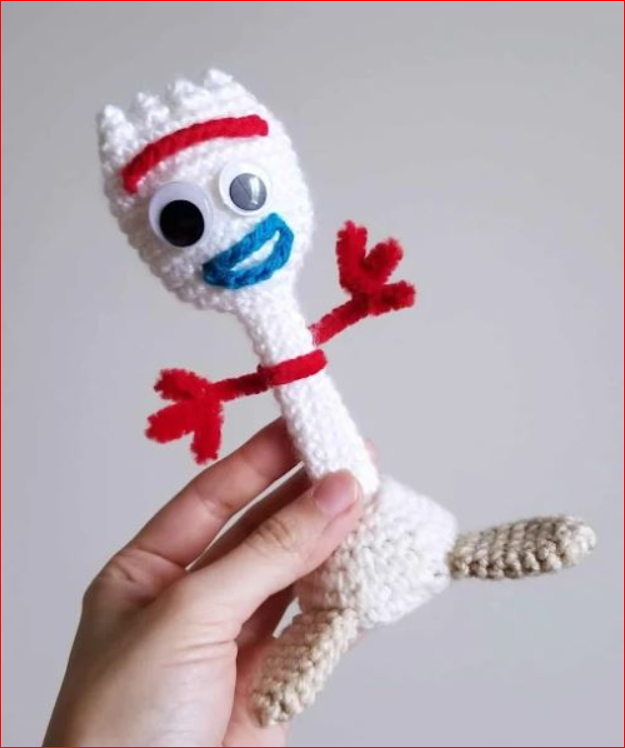
Using some hot glue, attach Forky’s eyes.
Sew on the ends of Forky’s eyebrows.
Sew on the top lip and the bottom lip separately.
Wrap the red pipe cleaner around the spork to make arms and fingers.
One pipe cleaner might not be enough, as you can see how short his
arms are on my amigurumi, but it only adds to its cuteness factor.
If you want longer arms like he does in the movie, you can try using 2
pipe cleaners.
All Finished.