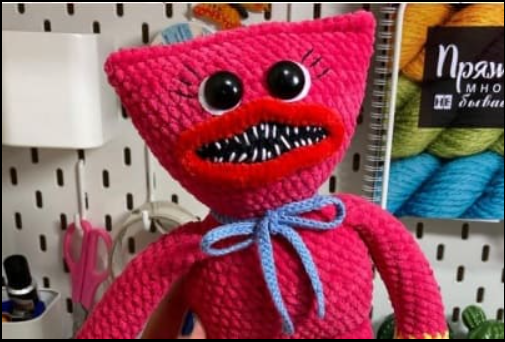
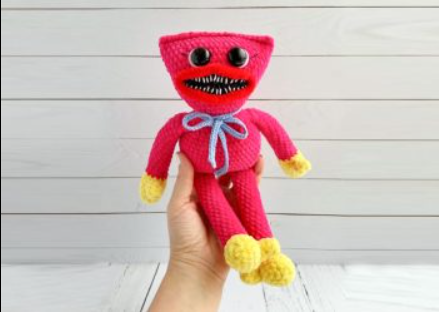
Hello Amigurumi followers, I wanted to share free amigurumi models with you on my Amigurumi mobi page. In my article, I share the Amigurumi Toy Crochet Plush Kissy Missy Free Pattern for you. In the article on my page, I give detailed information about the Amigurumi pattern;Amigurumi Toy Crochet Plush Kissy Missy Free Pattern.

Necessary materials and tools
1. Yarn Himalaya Dolphin Baby color 80314 (fuchsia) or and another bright pink color. I missed one skein quite a bit, if crocheted 3.75 mm;
2. Yarnart Dolce yarn color 761 (yellow);
3. Yarn Himalaya Dolphin Baby color 80318 (red);
4. Yarnart Jeans yarn color 53 (black);
5. Yarnart Jeans yarn color 15 (blue);
6. White Yarnart Jeans or any other yarn similar in composition. We will embroider teeth;
7. White felt;
8. Eyes for toys on a secure mount 16 mm or 18 mm;
9. Filler (holofiber or sintepukh);
10. Hook Clover 3.00 mm or any other convenient size hook;
11. Hook Clover 2.25 mm for knitting a mouth;
12. Glue moment “Crystal”.
• The size of the finished toy is 30 cm.
Abbreviations
Ch– Chain
MR– Magic ring
Sc– Single crochet
Inc– Increase
Dec– Decrease
Sl st– Slip stitch
Hdc– Half double crochet
Dc– Double crochet
All details, except for the mouth, are crocheted from plush yarn and crochet Clover 3 mm.
Arms (Make 2)
Finger.
Crochet with yellow yarn.
Rnd 1. ch 2 and in the second loop from the hook, crochet 6 sc, then knit in the round without sl st (6)
Rnd 2-4. 6 sc (6) (3 rows)
Fasten the thread and cut.
Main part of the hand
Crochet with yellow yarn.
Rnd 1. ch 2 and in the second loop from the hook, knit 6 sc, then crochet in the round without sl st (6)
Rnd 2. 6 inc (12)
Rnd 3. (3sc,inc)*3 (15)
Rnd 4-6. 15 sc (15) (3 rows)
Rnd 7. 5 sc, knit 3 sc together with finger loops, 7 sc (15)
Rnd 8. 5 sc, knit 3 sc only on the loops of the finger, 7 sc (15)
Rnd 9. (3sc,dec)*3 (12)
Start stuffing your finger and handle with filler.
Change the working thread to pink yarn.
Rnd 10-26. 12 sc (12) (17 rows)
Fill the handle with filler not completely, leave a void on top.
Now you need to tie both sides of the part together so that the finger was located parallel to the base of the arm, since when crochet handles in the body, the fingers should be turned towards you.
You may need to knit a few extra single crochet.
For the loops of both sides of the arm, crochet 6 sc.
Fasten the thread and cut.
Tie the second handle in the same way.
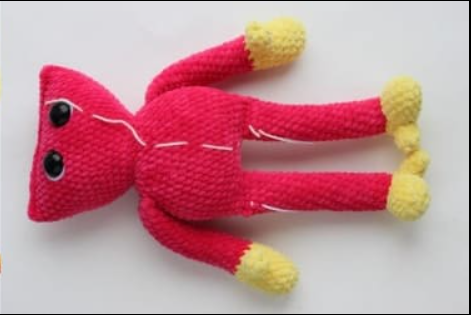
Legs (Make 2)
Finger.
Crochet with yellow yarn.
Rnd 1. ch 2 and in the second loop from the hook, crochet 6 sc, then crochet in the round without sl st (6)
Rnd 2-4. 6 sc (6) (3 rows)
Fasten the thread and cut.
Foot
Crochet with yellow yarn.
Rnd 1. ch 2 and in the second loop from the hook, crochet 6 sc, then crochet in the round without sl st (6)
Rnd 2. 6 inc (12)
Rnd 3. (3sc,inc)*3 (15)
Rnd 4-6. 15 sc (15) (3 rows)
Rnd 7. 5 sc, crochet 3 sc together with finger loops, 7 sc (15)
Rnd 8. 5 sc, crochet 3 sc only on the loops of the finger, 7 sc (15)
Rnd 9. 15 sc (15)
Rnd 10. (3sc,dec)*3 (12)
Stuff your foot with filler.
Rnd 11. 6 dec (6)
Pull the hole, hide the thread and cut.
Take pink yarn and knit 12 stitches on the foot without a crochet – this will be considered the first row of the legs.
Continue crocheting the leg as follows:
Rnd 2-21. 12 sc (12) (20 rows)
Fill the leg with filler not completely, leave a void on top.
Now you need to tie both sides of the part together so that the nose the legs were turned towards you, and the finger was on the left. Perhaps you you will need to crochet a few additional columns without nakida or vice versa dissolve several columns.
For loops crochet 6 sc on both sides of the leg.
Fasten the thread and cut.
Tie the second leg in the same way when you crochet the first a row of pink yarn on the foot of the leg, attach it to the first leg so that the toe is turned towards the toe of the first leg.
It turns out when we connect the legs and crochet the body, toes will point towards each other.
After being tied the second leg, do not cut the thread, we will connect the legs and continue to crochet the body.
This leg will now be under number one, and that leg with the cut thread is number two.
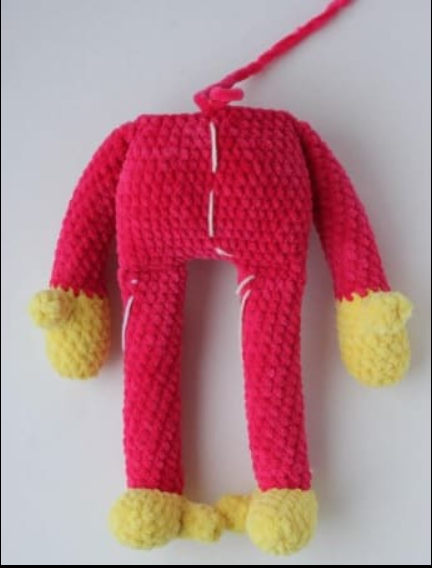
Body and Head
Rnd 22. Cast on 6 loops and crochet only on the front the walls of the loops of the second leg 6 sc, turn the crocheting to another side and now crochet for the front walls of the loops of the same leg 6 sc, 6 sc in air loops, crochet only along the front walls loops of the first leg 6 sc, turn crocheting to the other side and now crochet for the front walls of the loops of the same leg 6 sc (36)
Rnd 23. 6 sc in ch, 30 sc (36)
Work 3 offset stitches (3 single crochets), now start row will run in the middle of the body, if it is deviate to the right, then crochet another offset loop.
Rnd 24. (5sc,inc)*6 (42)
Rnd 25. 42 sc (42)
Rnd 26. 3sc, inc, (6sc,inc)*5, 3sc (48)
Rnd 27-32. 48 sc (6 rows)
Rnd 33. 3sc, dec, (6sc,dec)*5, 3sc (42)
Rnd 34. 42 sc (42)
Rnd 35. (5sc,dec)*6 (36)
In the next row, curl your hands so that the fingers will look towards you.
Rnd 36. 6 sc, crochet 6 sc together with the loops of the handle, 12 sc, crochet 6 sc together with the loops of the handle, 6 sc (36)
Rnd 37. 2sc, dec, (4sc,dec)*5, 2sc (30)
Rnd 38. (3sc,dec)*6 (24)
Rnd 39. 1sc, dec, (2sc,dec)*5, 1sc (18)
Stuff the body with filler.
Further, the beginning of the row does not need to be aligned.
Rnd 40. 1sc, inc, (2sc,inc)*5, 1sc (24)
Rnd 41. (3sc,inc)*6 (30)
Rnd 42. 2sc, inc, (4sc,inc)*5, 2sc (36)
Rnd 43. (11sc,inc)*3 (39)
Rnd 44. 6sc, inc, (12sc,inc)*2, 6sc (42)
Rnd 45. (13sc,inc)*3 (45)
Rnd 46. 7sc, inc, (14sc,inc)*2, 7sc (48)
Rnd 47-54. 48 sc (48) (8 rows)
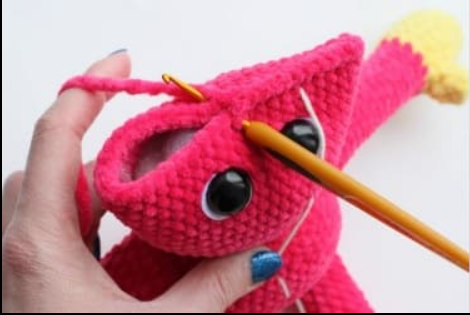
The next 55 row does not need to be knitted to the end, as we will tie together the loops of the two sides of the head (I did not finish 5 columns).
Rnd 55. 43 sc
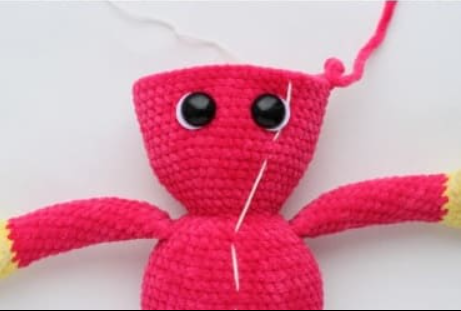
Prepare eyes for the toy, cut out circles of diameters 18-20 mm, make a hole in each circle and insert safety black eyes with a diameter of 18 mm. Glue with glue felt circles to the eyes. Insert the finished eyes between 52 and 53 side by side at a distance from each other 6 columns, on the wrong side secure them with plugs on the side.
Stuff your head with filler.
For the loops of both sides of the part we crochet 24 sc.
Fasten the thread, cut and hide inside the part.
Mouth
Crochet with black yarn and crochet 2-2.25 mm.
Make 19 ch.
Rnd 1. (crochet in the second loop from the hook) 7 sc, 4 dc, 6 sc, 3 sc in one st, (crochet on the opposite side of the chain) 5 sc, 6 dc, 5 sc, 2 sc in last st (38)
Rnd 2. 7 sc, hdc, 2 inc hdc, hdc, 7 sc, inc, 6 sc, 2 hdc, 2 inc hdc, 2 hdc, 6 sc, inc (44)
Change the working yarn to plush red yarn, leaving 30 cm of black yarn for sewing on the mouth. Continue to crochet 2-2.25 mm.
Rnd 3. 44 sc (44)
Fasten the thread and cut.
The upper lip of the mouth is where 4 dc were crocheting, and the lower lip is where they crocheted 6 dc.Take white yarn and embroider teeth with straight stitches.
Sew the mouth right under the eyes.
Take black yarn or floss and embroider eyelashes.
Felt from the peephole glue to the muzzle of the toy with glue.
Bow Tie
Crochet with blue yarn and crochet 2-2.25 mm.
Make 136 ch.
Rnd 1. (crochet in the second loop from the hook) 135 sc (135)
Fasten the yarn and cut. Tie a bow around the neck of Kissy Missy.
All Finished